Presentation Recording System
You can request to have all of your classes for the semester automatically recorded in this room. Or you can manually do an impromptu on-demand recording when you need it. To request a recording to be set up, or to let us know you have created a recording, please go to our online service portal and fill out this form.
On-Demand Recording
- If you have multiple screens in your classroom, set your control panel to show the same image on all screens.
- Turn on your microphone in order to be heard on the recording. Test the volume of the mic in the room to ensure you are heard easily.
- Display what you wish to show on the screen as you normally would. Example, plug your laptop into the HDMI connector and choose HDMI to show on the screen.
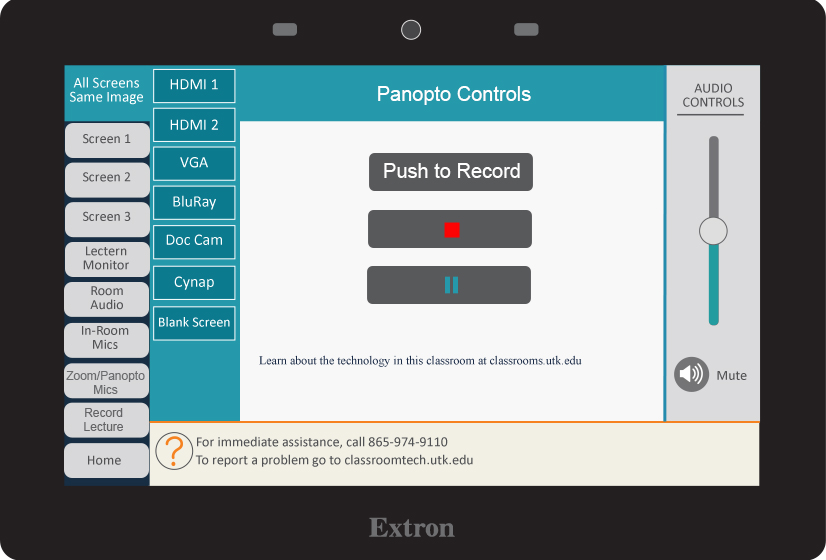
- On the Control panel, under the tabs on the left, choose Record Lecture.
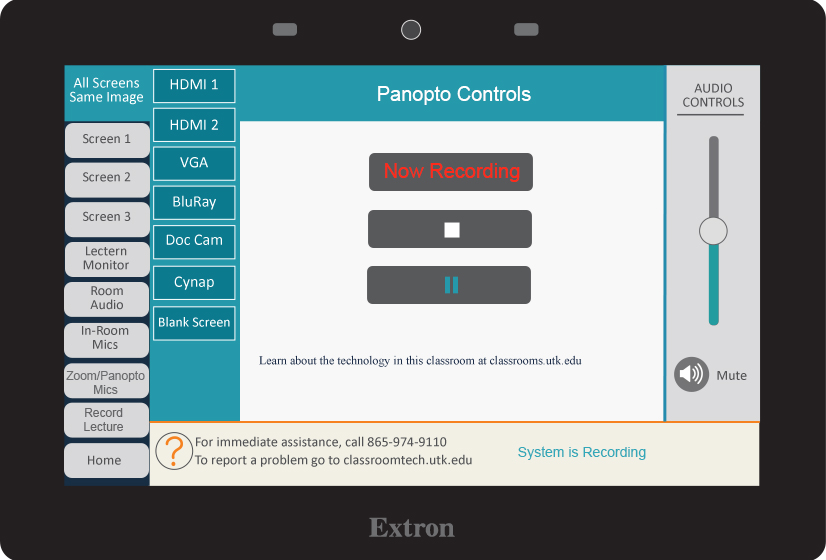
- Choose the Push to Record button the text will change to Now Recording and a message System is Recording will appear in the bottom.
- To pause the recording, tap the blue pause button.
- To stop recording, tap the white square.
- While recording, you may leave this screen to switch inputs being shown on the projector. The System is Recording message will stay at the bottom of the screen to let you know you are still recording.
- Then contact us at our online service portal to let us know the building, room, time, date, and your information.