Skip to content Skip to main navigation Report an accessibility issue
Hodges room 128 shows node chairs facing instructor podium with door leading to hallway near instructor podium

Hodges 128 – Departmental Classroom

This is a departmentally-owned room. OIT can offer some assistance with learning the technology in this classroom, but because this is a departmentally-controlled space, we are not able to offer full assistance. Information on this page may not be completely accurate and may be outdated due to department updates.

Note: the control panel listed here is similar but not identical to the one in the classroom.

Classroom Access button with icons for map, listening, wheelchair access, and classroom photos

Your Room Contains

Classroom Resources:
Instructor Resources:
  • Control Panel: AMX Style 27
  • Classroom computer: Departmentally-supplied Mac
  • 1 Cynap(s)
  • Blu-ray
  • Cables:
    •  HDMI cable(s)
    •  VGA Cable(s)
Instructor Screens:
  •  Podium Monitor(s)
Audience Screens:
  • 1 Ceiling Projector(s)
  • 1 Interactive Whiteboard(s)
Audio Visual:
  • 1 Camera(s)
  • 1 Lapel Microphone(s)

How To...

control panel

Display on Projector Screens:

  1. Tap Turn System On.
  2. From the Main Projector drop-down menu, choose the input or device you wish to display on the projector screen.
  3. From the Wall Projector drop-down menu, choose the input or device you wish to display on the projector screen.
  4. Under Audio Source, remember to choose the item you wish to be heard over the room speakers.
AMX Style 27 Main Screen
STEP 1
AMX Style 27 sub screen 1
STEP 2-4


When Finished

  1. Tap Return to Main Page.
  2. Choose System Off.

For more information and basic troubleshooting, go to the Technology Training area.


mac computer

Some rooms on campus have supplied computers in the classroom. The computer in this room is supplied by the department that primarily uses the space. OIT does not have access to login information on this machine. Please contact your department to get information on how to log in or use this computer.

If this computer is using a departmentally provided username/password, make sure you log out of any app when you are done. Otherwise, anyone who logs onto the computer will be able to log into your apps under your name.

Possible Feature: Using the Camera and Supplied Computer

Some departments chose to connect a room-provided camera to the computer. IF your classroom has a camera, it MAY be connected to the room computer. If so, you should be able to use the Classroom Supplied Computer to run a Zoom meeting using the in-room microphone and camera. Note – logging onto the classroom supplied computer to Zoom will log you out of Zoom on your personal computer.

  1. Log onto the computer using your NetID and Password (or the computer may already be logged in for you with a local account).
  2. Launch Zoom
  3. Choose Sign in
  4. Select the Sign in with SSO option on the right.
  5. Type in Tennessee before the .zoom.us
  6. Select Continue
  7. Log in to Zoom with your NetID and Password
  8. Approve the Two-Factor Authentication
  9. Choose Launch Zoom
  10. Launch your meeting
  11. Choose Join with Computer Audio (you may want to select the checkbox to Automatically join audio by computer when joining a meeting as well)
  12. Turn on the lavalier (lapel-style) mic.

These instructions will help you to connect a device to the Cynap.

Go to our Cynap page in the Technology Training section for more advanced features of using Cynap.

Connecting Your Laptop Wirelessly:

  1. Connect your laptop.
    • On Windows: 
      1. Use the Windows Key + K Key to bring up the Project menu.
      2. Choose Connect to a wireless display
      3. Choose the Cynap for your room. 
    • On MacBook: 
      1. Select the Screen Mirroring icon in your menu bar to see available devices. 
      2. Select the Cynap for your room. 
  2. Enter the 4-digit code that appears at the top of the Cynap screen on your laptop. Your laptop will appear on the Cynap screen. 

Use these steps to display a device that is hooked up using an HDMI cable; this includes the document camera or a laptop.

1. On the Control Panel under the Cynap Input menu, select the device you want to display from the Cynap onto the projector. You can select from your document camera, laptop connected with HDMI, USB-C, VGA, or Blu-ray player.
Note: Your control panel may look slightly different than the image on the right.
example of control panel MicrosoftTeams-image-1.jpg
2. Go to the instructor podium to view the Cynap screen.instructor podium monitor showing Cynap
3. On the Cynap screen, tap the screen and select the [ + ] button.plus sign from Cynap
4. Then, select Cynap Input to add the device previously selected on the Control panel. This icon may be labeled slightly differently, such as Input or HDMI (even if you are connected another way such as USB-C).picture of the cynap input icon
5. Your selected device will appear on the Cynap screen. If you are not in mirror mode, where the instructor screen is mirrored on the main screen, you can send the image over to the main projector screen by tapping the bottom menu of the window on the Cynap and choosing the Send to Projector button.
Note: OIT recommends using Mirror mode to make things simpler. If you use Mirror mode, make sure you go to your home screen on the control panel and turn the system off, then turn the system back on at the beginning of class. This will reset your PIN code for Cynap so that previous users will not have the PIN code.
mirror mode on control panel under Cynap

The Blu-ray player is located inside the instructor podium and the basic controls area available on the control panel.

The Blu-ray player can play Blu-rays, standard DVDs and Music CDs coded for Region 1 - Canada, the United States and U.S. territories.

Getting Started

  1. Begin by using the control panel to turn the projection system on. If your classroom has multiple projectors, there will be more than one projection option at the top of the control panel.
  2. To enable the Blu-ray player, select which projector you wish to display the Blu-ray/DVD through and select DVD Player option.  
  3. Load your Blu-ray/DVD into the player.
  4. Use the control panel to access the menu controls and select Enter to play a Blu-ray or DVD.

See this example for how the DVD controls will look on your control panel. Notice you can play, stop, pause, rewind, fast-forward and step ahead. You also have a subtitles on/off option. Use the circular menu for moving through the on-screen menu on your DVD.

DVD menu controls

The camera in your classroom can be controlled by the Control Panel in your room. You should see a Camera control button on the panel. This is usually under the Cynap menu. On this button, you can pan, tilt, and zoom in with your camera. In some classrooms, cameras may have preset controls that will move them to a set spot and zoom. Try out the controls available to you in your room.

Tip: if you are zoomed in, the pan and tilt will be more pronounced. Zoom out to have more control over the movement of the camera.

These cameras are set up to use with Zoom or Panopto, which you can access through the WebRTC app on your Cynap.


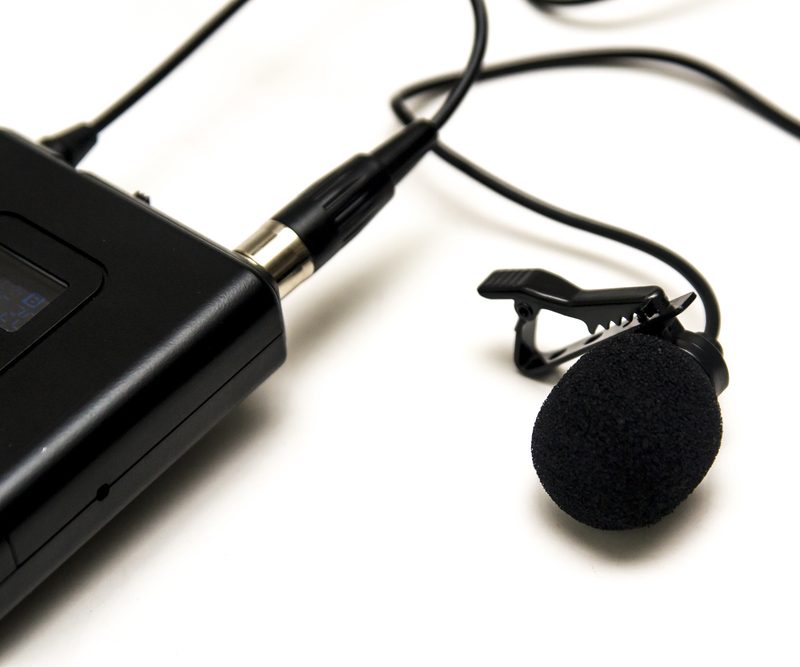
Lapel-style microphones are called Lavalier mics. Lavalier microphones are clipped to your shirt about 3-6 inches below your chin and come with a battery pack you can clip to a belt or slide in a pocket.

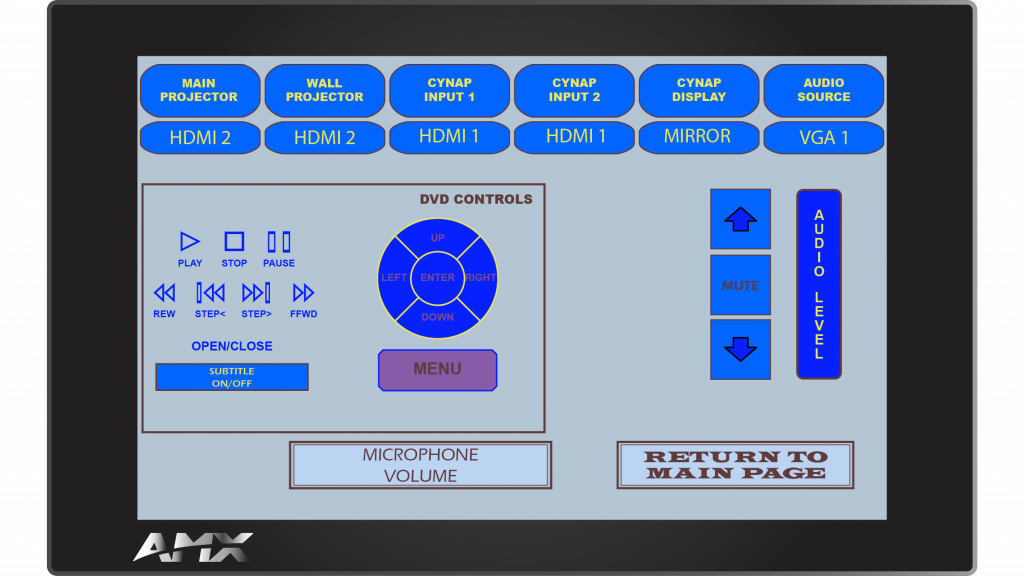
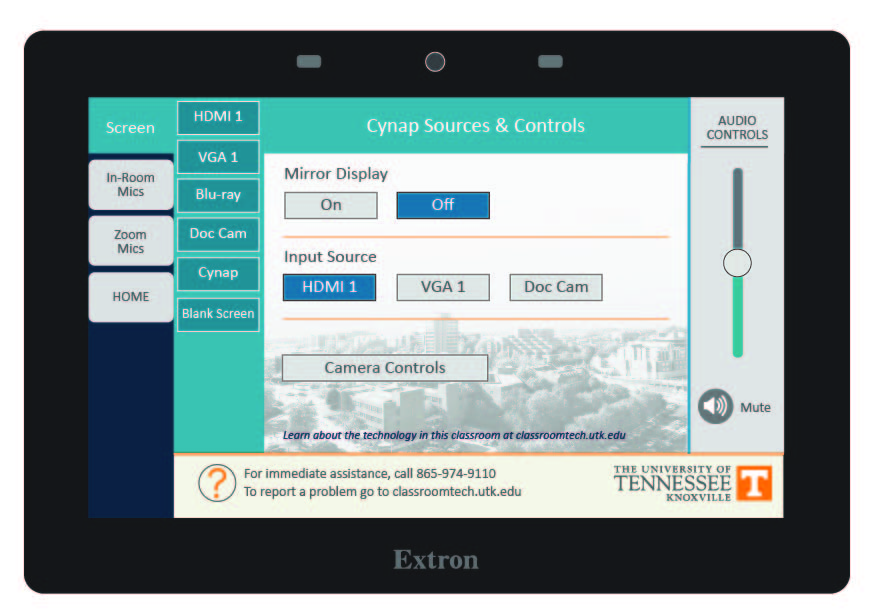
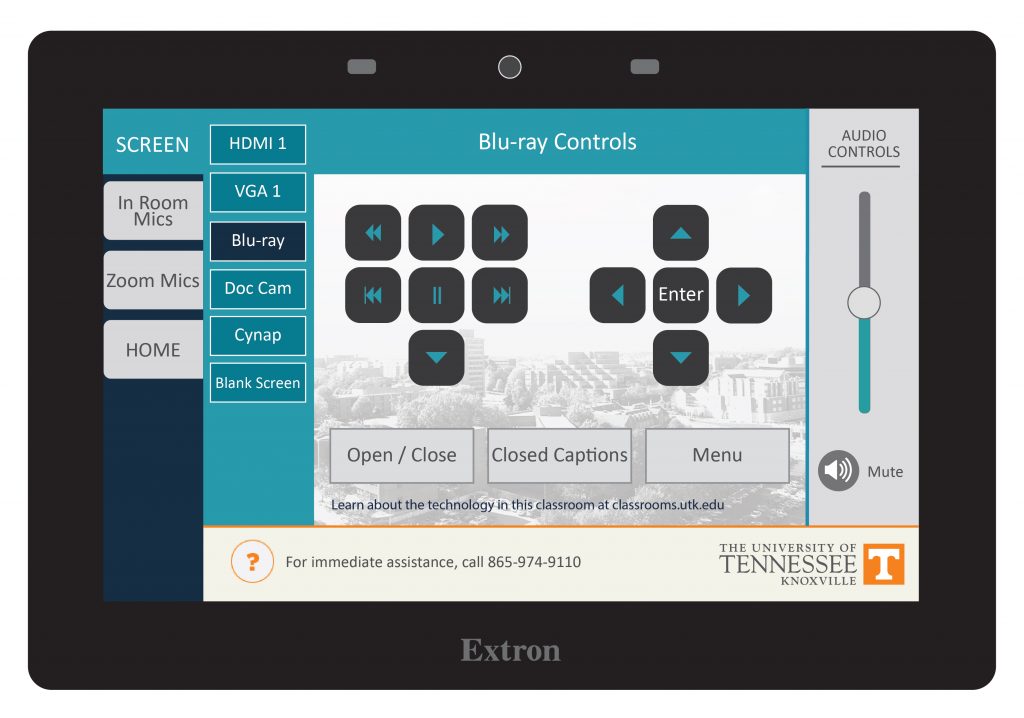
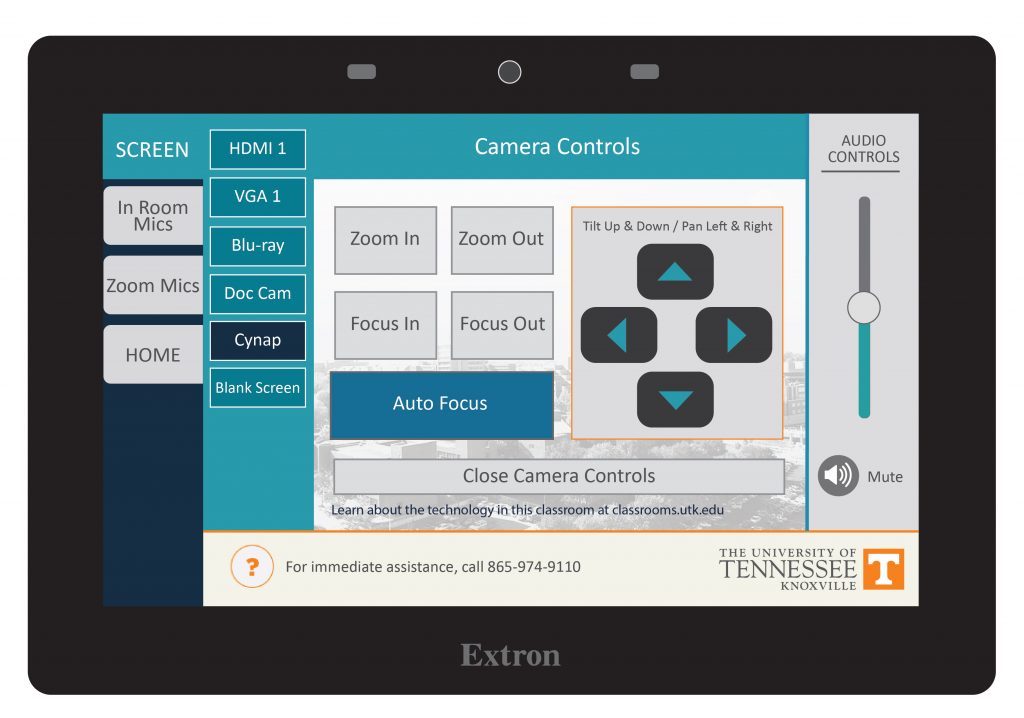
Tip: Adjust sound levels by going to the tab for in-room mics or microphones on the control panel. You can adjust the sound level for when you use Zoom or Panopto by going to the tab for Zoom/Panopto mic.

Each mic has been programmed to work with the audio system in your classroom. These mics will not work in other rooms because they have not been set to work with another room system and may also be incompatible with some of the equipment in that room. Please contact OIT if you need additional mics in your classroom.

Tip: when you switch the battery pack on, if the light is green, the battery charge is good. If the light is red, the battery is getting low.

To change the battery on this microphone, look for the small tab either on the side or bottom of the battery pack. Mics will take either D or AA batteries. These batteries should be available in the cable drawer of your podium. If you do not have batteries and need some immediately, contact the emergency line of the OIT HelpDesk at 865-974-9110. If you wish to just report that the room needs batteries for next time, please contact the main number of the OIT HelpDesk at 865-974-9900.