Skip to content Skip to main navigation Report an accessibility issue
tables and chairs facing wall monitor

Law 12B – Departmental Classroom

This is a departmentally-owned room. OIT can offer some assistance with learning the technology in this classroom, but because this is a departmentally-controlled space, we are not able to offer full assistance. Information on this page may not be completely accurate and may be outdated due to department updates.

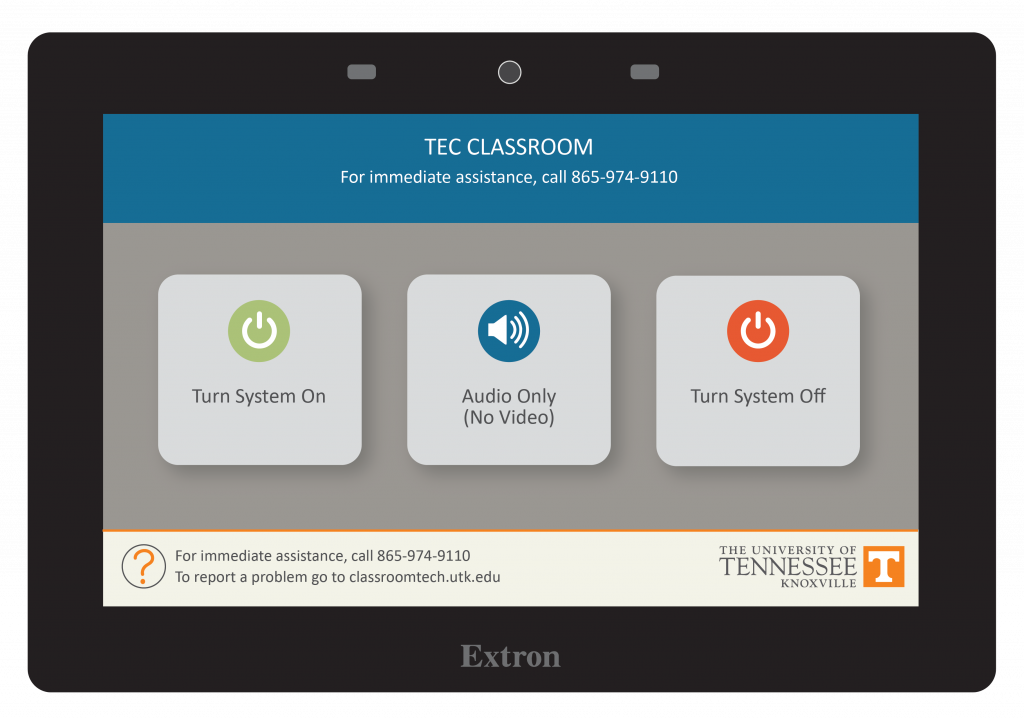
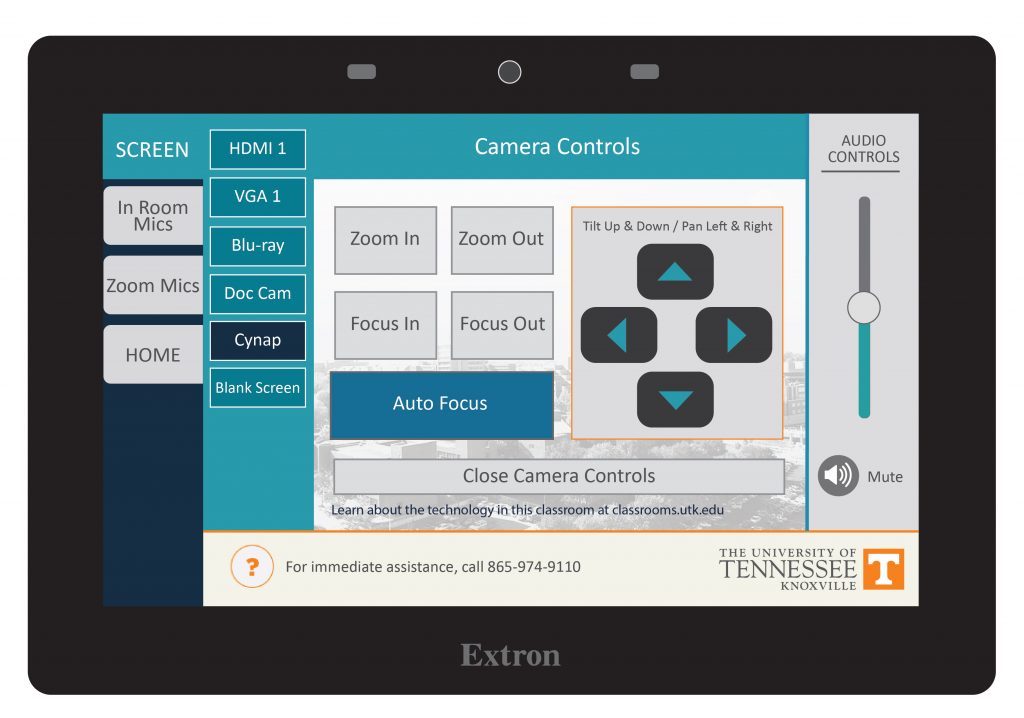
Note the control panel displayed here is not exactly what is in the room. Please see the picture on the accessibility site for what is exactly in the room.

Classroom Access button with icons for map, listening, wheelchair access, and classroom photos

Your Room Contains

Classroom Resources:
Instructor Resources:
  • Control Panel: Wall Style 11
  • Classroom computer: Departmentally-supplied Windows
  • 1 Cynap Core Pro(s)
  • Cables:
Instructor Screens:
Audience Screens:
  • 1 Wall Monitor(s)
Audio Visual:
  • 1 Camera(s)
  • 1 Conference Microphone(s)

How To...

Display on Screen:

  1. Tap Turn System On
  2. Tap Screen
  3. Choose the device you wish to display on the screen such as a laptop connected to Cynap, and HDMI.
    Note: the Blank Screen option will stop the currently selected image from projecting.

When Finished

  1. Tap Home
  2. Choose Turn System Off
Control Panel main page with buttons for Turn System On, Audio Only, and Turn System Off
STEP 1
STEPS 2-3

a graphic of a Dell computer

Some rooms on campus have supplied computers in the classroom. The computer in this room is supplied by the department that primarily uses the space. OIT does not have access to login information on this machine. Please contact your department to get information on how to log in or use this computer.

If this computer is using a departmentally provided username/password, make sure you log out of any app when you are done. Otherwise, anyone who logs onto the computer will be able to log into your apps under your name.

Possible Feature: Using the Camera and Supplied Computer

Some departments chose to connect a room-provided camera to the computer. IF your classroom has a camera, it MAY be connected to the room computer. If so, you should be able to use the Classroom Supplied Computer to run a Zoom meeting using the in-room microphone and camera. Note – logging onto the classroom supplied computer to Zoom will log you out of Zoom on your personal computer.

  1. Log onto the computer using your NetID and Password (or the computer may already be logged in for you with a local account).
  2. Launch Zoom
  3. Choose Sign in
  4. Select the Sign in with SSO option on the right.
  5. Type in Tennessee before the .zoom.us
  6. Select Continue
  7. Log in to Zoom with your NetID and Password
  8. Approve the Two-Factor Authentication
  9. Choose Launch Zoom
  10. Launch your meeting
  11. Choose Join with Computer Audio (you may want to select the checkbox to Automatically join audio by computer when joining a meeting as well)
  12. Turn on the lavalier (lapel-style) mic.

The Cynap Core Pro can have a wireless device attached to it. In some classrooms, it is not set up for recording in Zoom, Panopto, or Teams, but it is in others.

See this page for detailed instructions on connection to Cynap wirelessly on Mac or Windows.

Connecting Your Laptop Wirelessly:

  1. Connect your laptop.
    • On Windows: 
      1. Use the Windows Key + K Key to bring up the Project menu.
      2. Choose Connect to a wireless display
      3. Choose the Cynap for your room. 
    • On MacBook: 
      1. Select the Screen Mirroring icon in your menu bar to see available devices. 
      2. Select the Cynap for your room. 
  2. Enter the 4-digit code that appears at the top of the Cynap screen on your laptop. Your laptop will appear on the Cynap screen. 

Use these steps to display a device that is hooked up using an HDMI or USB-C cable; this includes the document camera or a laptop.

Option 1. Control Panels: If your classroom has a control panel where you choose HDMI, USB-C, or Blu-Ray player follow these instructions:

On the Control Panel under the Cynap Input menu, select the device you want to display from the Cynap onto the projector. You can select from your document camera, laptop connected with HDMI or USB-C, or Blu-ray player.
Note: Your control panel may look different than the image on the right.

---------------------------------------------------------------------
Option 2: Wall Touchscreen Only
: If your classroom has a touchscreen monitor and the control panel does not specify connection type, connect your laptop and skip to step 2.
example of control panel MicrosoftTeams-image-1.jpg
2. On the Cynap screen, tap the screen and select the [ + ] button.instructor podium monitor showing Cynap
3. On the Cynap screen, tap the screen and select the [ + ] button.plus sign from Cynap
4. Then, select Cynap Input to add the device previously selected on the Control panel. This icon may be labeled slightly differently, such as Input or HDMI (even if you are connected another way such as USB-C).picture of the cynap input icon
5. Your selected device will appear on the Cynap screen.
6. Note: If you are recording using Zoom or Panopto, you will need to tap your laptop or other screen you wish to share full screen with the class to make it larger after tapping the share screen button in Panopto/Zoom.picture of the cynap input iconCynap Screen enlargement icon


The camera in your classroom can be controlled by the Control Panel in your room. You should see a Camera control button on the panel. This is usually under the Cynap menu. On this button, you can pan, tilt, and zoom in with your camera. In some classrooms, cameras may have preset controls that will move them to a set spot and zoom. Try out the controls available to you in your room.

Tip: if you are zoomed in, the pan and tilt will be more pronounced. Zoom out to have more control over the movement of the camera.

These cameras are set up to use with Zoom or Panopto, which you can access through the WebRTC app on your Cynap.


conference microphone system

These conference-style systems are in classrooms to enable discussions during Zoom meetings or to allow audience comments to be recorded when using Panopto.

Tip: When muted, this microphone has a series of red lights around the top. Tap the mute/unmute button on the conference mic to unmute. When unmuted, it will have a green light on top.

  • Participants can be as many as 10-20 feet away from the system and still be heard clearly. Softer spoken individuals should be closer to the system. Louder individuals may be picked up as far away as 20 feet.
  • These systems do not amplify sound into the classroom.