Skip to content Skip to main navigation Report an accessibility issue
Zeanah 123. Room includes tables and chairs. Instructor podium includes the control panel, instructor screen, and a spot for laptop.

Zeanah Engineering Complex 123

Room Technology Updated: Fall 2021

Max Capacity: 60
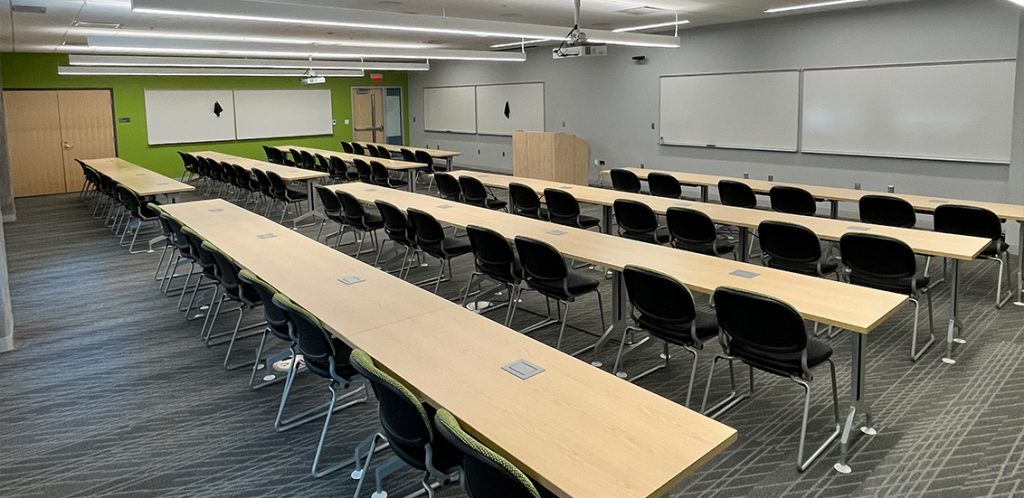
Your Room Contains

Classroom Resources:
Instructor Resources:
  • Control Panel: Zeanah Style 2
  • 1 Document Camera(s) with Manual Button Controls
  • Cables:
    • 1 HDMI cable(s)
    • 1 VGA Cable(s)
Instructor Screens:
Audience Screens:
  • 2 Ceiling Projector(s)
Audio Visual:
  • Hearing System

How To...

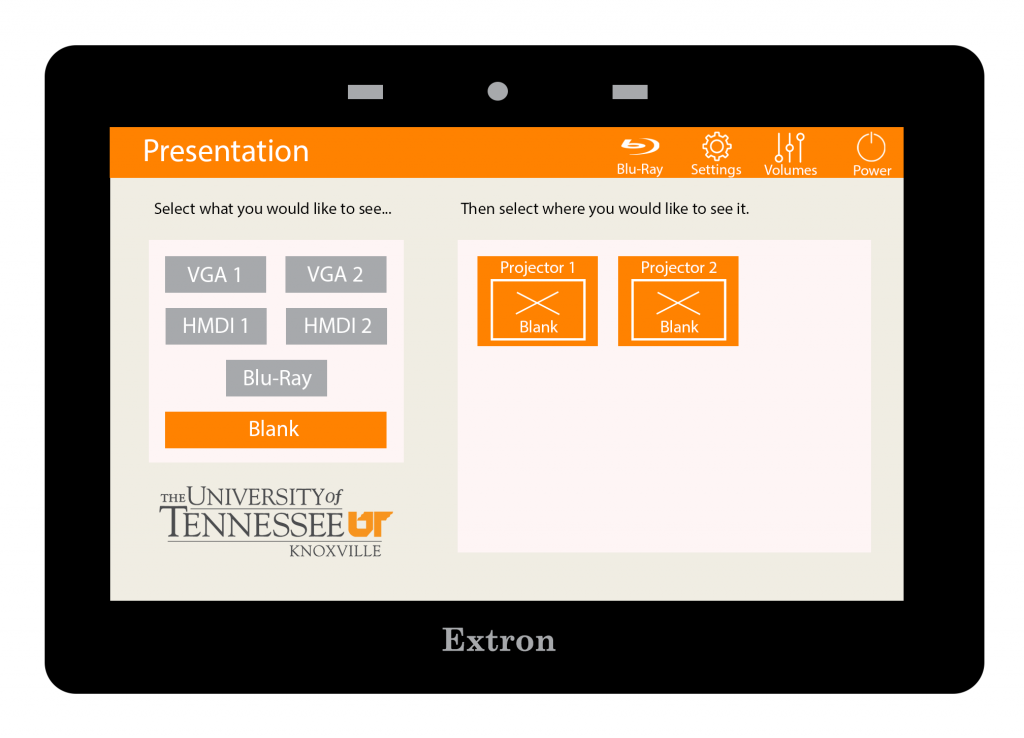
Control panel diagram

Please note: The Zeanah classrooms were installed by the contractor. The control panels do not match control panels in other buildings on campus.

  1. Tap the University of Tennessee screen to turn the system on.
  2. Plug in your laptop using HDMI or VGA.
  3. Look at the cable to see what number is on the very small sticker on the HDMI or VGA cable. Stickers will say: HD001, HD002, VGA01, or VGA02.
  4. The number on the cable corresponds to the display menu on the control panel. Example: if you plugged in using cord HD001 then choose the button for HDMI 1.
  5. Choose Doc Cam to show the document camera.
  6. Choose Projector 1 or Projector to show what you have selected on the left. You can show different items on projector 1 and 2.
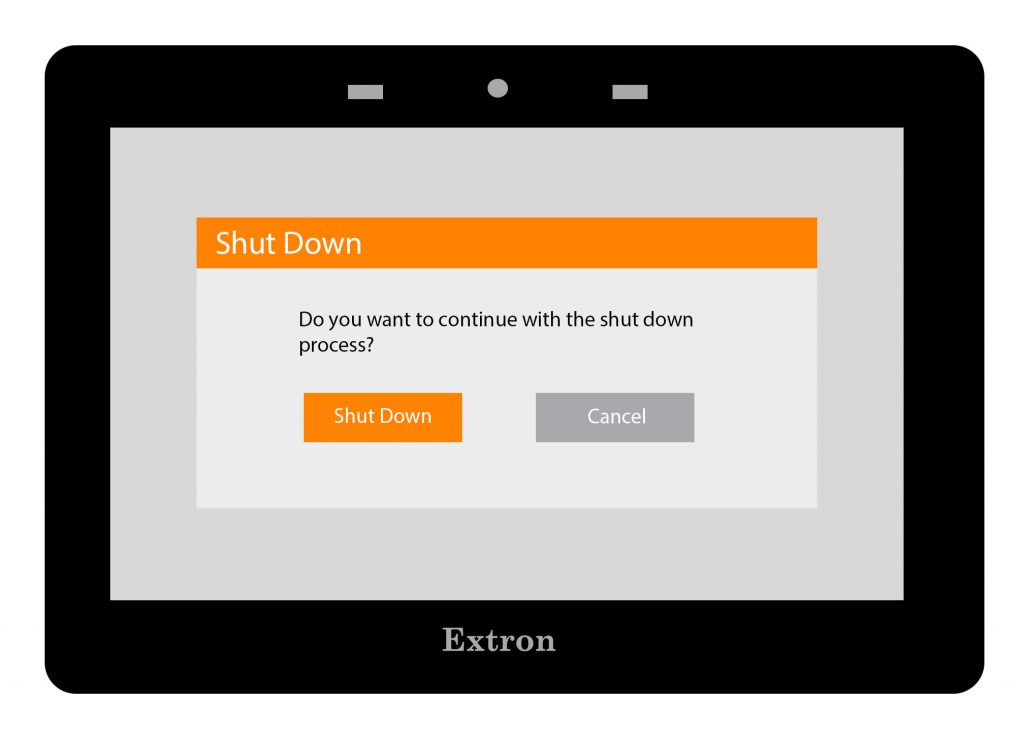
  7. When finished, tap the power button and choose Shut Down.
Step 1
Steps 5-6
Step 7

When Finished

  1. Tap Return to Main Page.
  2. Choose System Off.

For more information and basic troubleshooting, go to the Technology Training area.
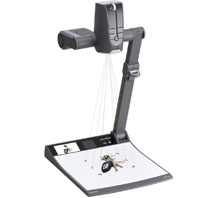

document camera with manual buttons

The document camera located in your classroom allows you to easily display documents, objects, and simple demonstrations to an entire classroom and/or lecture hall.  

Key Features:

  • Zoom wheel, which allows for closer details of the images or objects being projected
  • Continuous auto-focus that adjusts as you zoom in and out to keep your image in clear focus
  • LCD preview
  • A brightly lit working surface
  • Loop-pull up for easy setup
  • Freeze frame, which freezes the image displayed through the projector system

How to Use the Document Camera:

  • Lift up the document camera with the loop-pull and the camera will automatically turn on.  If your doc camera does not turn on, tap the button located either at the top of the working surface or to the right of the working surface.
  • Place your document or demonstration on the working surface 
  • Ensure auto-focus is enabled to have a continuous clear presentation  

Other Resources:

Watch a video on the basic steps to using the Document Camera.


Control panel diagram

Please note: The Zeanah classrooms were installed by the contractor. The control panels do not match control panels in other buildings on campus.

These instructions are for using the Cynap in the combined classroom. These instructions are for the following areas:

  • ZEC 170, 171, 177, 178 (Combined)
  • ZEC 270, 271, 277, 278 (Combined)
  • ZEC 370, 371, 377, 378 (Combined)
  1. Tap the University of Tennessee screen to turn the system on.
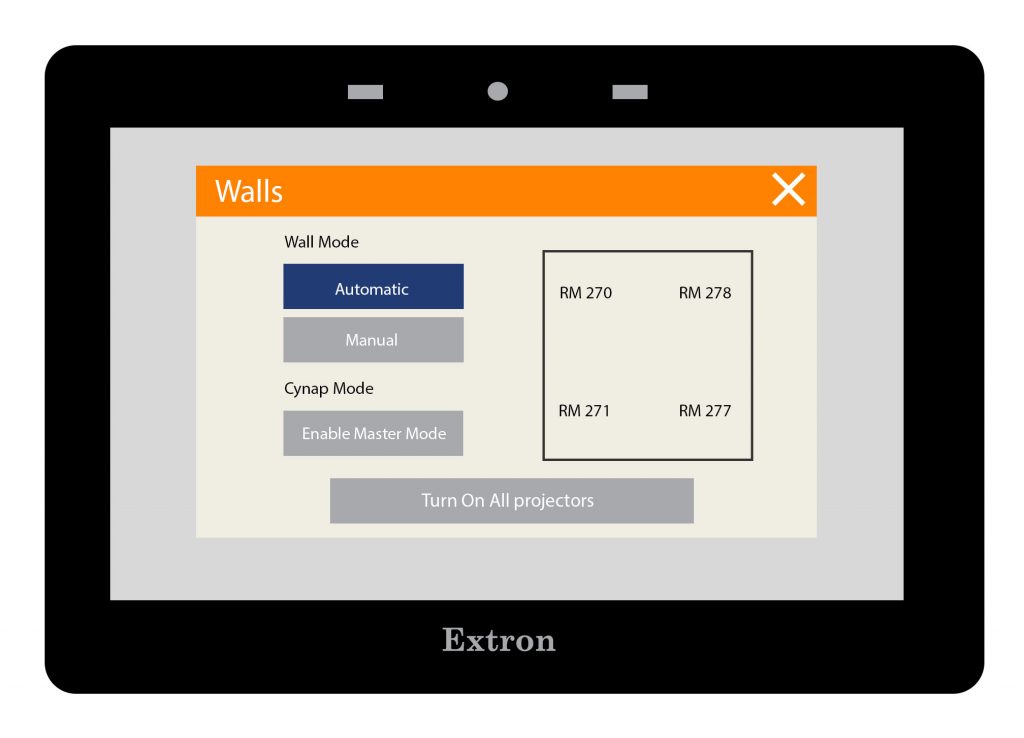
  2. Under Walls, Turn on All projectors.
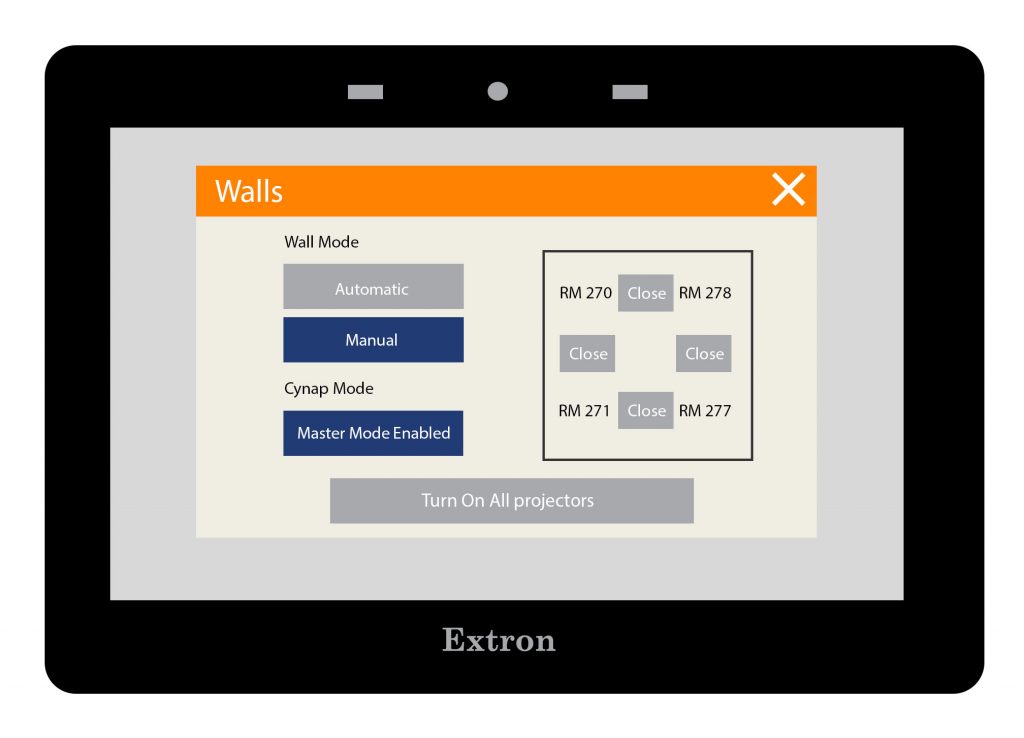
  3. Choose Manual. You may choose which projectors you wish to use.
  4. Choose Enable Master Mode. (You will see a message pop up that says: "Enabling Master Mode. Please Wait.."
  5. Tap the interactive instructor screen to control the Cynap.
  6. Each of the four rooms contains a Cynap and a Cynap core. The name of the Cynap is in the top left of each of the screens.
  7. When finished, return to the main Presentation screen and choose Power.
Zeanah Load Page "The University of Tennessee Knoxville" logo. "Press anywhere to start"
Step 1
Steps 2 and 3
Step 4